Last Updated on 2021-09-01 by Harry Masterton


Using the entire face of a board can produce appealing results. The problem for most woodworkers is that butt joinery lacks the strength that they desire. Learning how to make a tongue and groove joint might be the answer.
The design has been around for several centuries. Knowing how to cut tongue and groove joints was necessary before plywood sheeting was available. Cutting tongue and groove joints into boards allowed carpenters to create flooring and walls.
Parquetry (decorative mosaics made from wood) was another form of carpentry that required cutting tongue and groove joints along the edges of boards. That includes piecing together re-entrant angles that are greater than 180-degrees.
Even modern laminate flooring is joined using machined tongue and groove board to manufacture easy to lay wood floor. Hardwood flooring or engineered wood board features tongue and groove joinery.
If you are making your own wood flooring using tongue board with a matched groove always remember to take wood shrinkage into account particularly as the room warms
How To Make A Tongue And Groove Joint
Learning how to make a tongue and groove joint requires that you use one of the following tools:
- Traditional hand planes
- Table saw
- Matching router bits
Learning how to cut tongue and groove with traditional hand planes

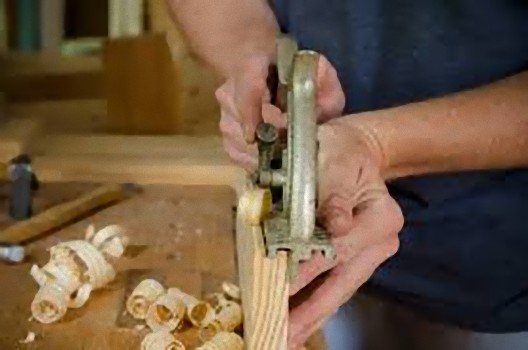
If you like hand tools, then using vintage planes is one way to create this woodworking joint. Matching planes would produce a tight fit between the tongue and groove that they would fit. The use of these dedicated specialty planes has fallen out of favor as several power tool options are now available.
The best place to source good vintage hand planes and tongue and groove planes is eBay. There is always a great selection of the stanley no 48 tongue and groove plane model available
Cutting tongue and groove with a table saw
One popular method for creating these joints is using your table saw. You can make several passes with a single blade on the grooves, but a dado stack will cut the joinery in a single pass. The setup 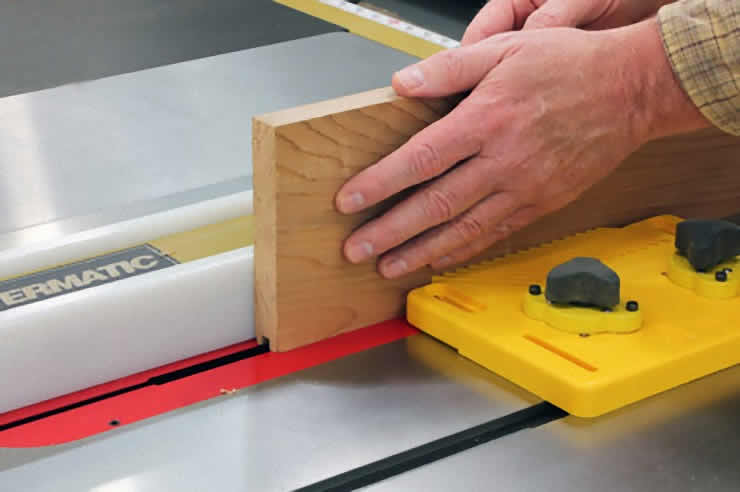
Mastering how to cut tongue and groove with the router
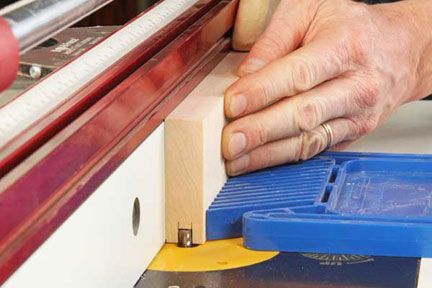
A quick method for cutting this joinery is by using your router table. Using a straight bit will be familiar to many, but you might consider using a slot cutter bit. Matching bits are available that will produce a tight tongue and groove joint, as well.
What Is A Tongue And Groove Joint?

What is a tongue and groove joint used to make? Projects panels, floors, and walls are items that use this wood joint.
Tongue And Groove Joint Advantages And Disadvantages
The joinery has been in use for hundreds of years for a reason. It offers several advantages that make it appealing to carpenters and fine woodworkers. There are also a couple of potential issues you need to consider when learning how to make a tongue and groove joint.
Tongue and groove joint advantages and disadvantages: How it helps
- Stronger than butt joint – It offers more sheer resistance than a butt joint. If used on a project with little potential wood movement, you can consider adding glue to the joint. There is more surface.
- Can provide movement for wood – In areas where seasonal movement happens (floors, walls, etc.), the joint can provide some relief along the board edges.
- Easy to assemble – The wood joint slides together and is not difficult to construct.
- Requires little cleanup – Once cut, the tongue and groove should not need additional shaping or cleaning. The components are hidden from view and should be smooth from the tool's cutting edge.
Tongue and groove joint advantages and disadvantages: Potential issues
- You can see it – The joinery will be highly visible on the ends of the panels. It will take extra work to make them less visible along the faces if you use timber with rounded edges as well.
- It can wear down – On joints that lack glue, the fit can become loose with time, especially with pressure from walking or support.
Types Of Tongue And Groove Joints
As you learn how to make a tongue and groove joint, you will discover two types of this joinery.
Types of tongue and groove joints: The solid tongue joint
The solid tongue joint is what most think of when it comes to tongue and groove joint types. A solid tongue on one board's edge slides into the groove on another.
Gluing tongue and groove joints of this kind does not require glue since the tongue is part of one of the two boards used for the joint.
Types of tongue and groove joints: The slip tongue joint
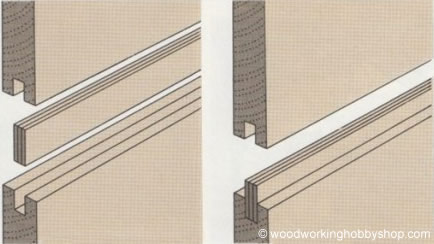
The assembly requires gluing tongue and groove joints of this design, as the joinery will fall apart with glue.
How To Make A Tongue And Groove Joint Step By Step
Learning how to make a tongue and groove joint is simple, no matter which method you use to create the joinery. What follows are a few “how to make a tongue and groove joint step by step” by hand, table saw, and router.
Each “How to make a tongue and groove joint step by step” will provide a general process, but your particular tool setup might require additional steps. Others may be unnecessary, so refer to your power tool operator's manual for special considerations.
How To Make A Tongue And Groove Joint By Hand
Traditionally, learning how to make a tongue and groove joint used to involve hand planes. Specialty planes like the Stanley 48 tongue and groove plane are available at garage sales, flea markets, and eBay. Other Stanley tongue and groove plane designs work well for cutting tongue and groove by hand but are rare and cost more.
The Lie-Nielsen No. 48 Large Tongue and Groove Plane is a newer model that works great for cutting tongue and groove by hand. It has a big price tag, though. That might make a Stanley 48 tongue and groove plane purchase and restoration mandatory for many of us.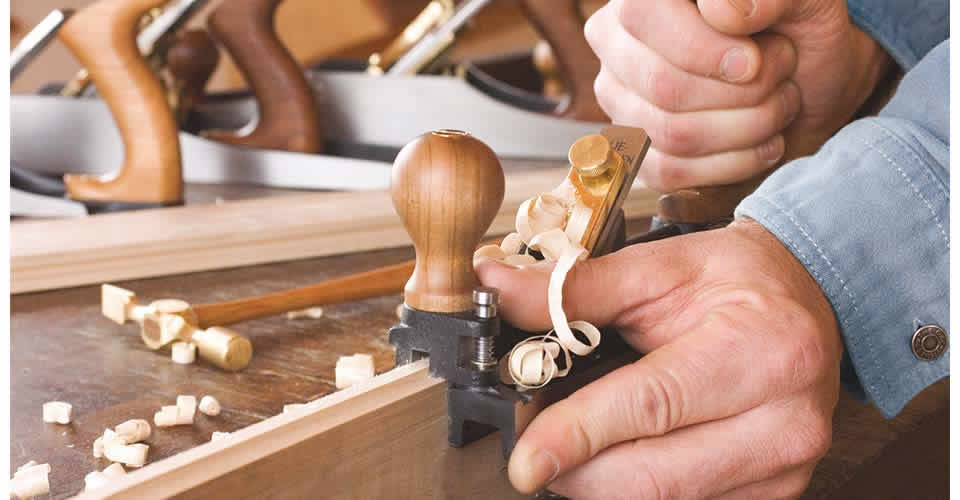
No matter if you use a restored Stanley tongue and groove plane or modern counterpart, learning how to make a tongue and groove joint by hand includes these steps:
How to make a tongue and groove joint by hand
- Secure the workpiece – You will place the wood in a vise. The edge needs to stand above the vise, providing clearance for the hand plane fence as you remove material.
- Adjust the hand plane for tongue cuts – You can flip the guides to expose both cutting blades. Each blade will cut away the side waste, leaving the tongue.
- Set the fence – Secure the fence so that it supports the hand plane as you move across the edge of the board.
- Make the tongue – Start at the end near you and push the plane across the edge of the board. Make several passes, cutting the tongue to the desired depth.
- Secure the workpiece – For the groove cut, flip the board over to display the opposite edge or place a new board.
- Adjust the hand plane for groove cuts – Flipping the guide will expose a single cutting blade used to create the groove
- Follow previous steps – Adjust, set, and similarly use the hand plane as before to create the groove.
How To Make A Tongue And Groove Joint With A Table Saw
Can you make tongue and groove with a table saw?
Can you make tongue and groove with a table saw? Yes. Making tongue and groove with table saw blades is second only to the router bit in popularity.
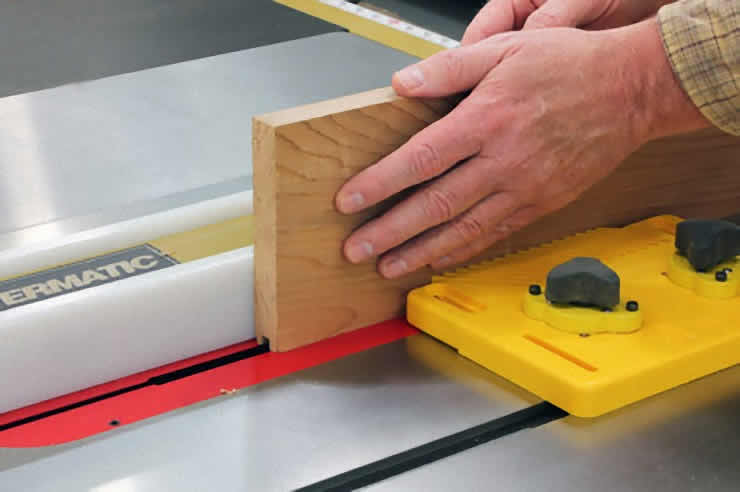
Setup is crucial when learning how to make a tongue and groove joint on any tool, including the table saw. Having a rip fence that you can micro-adjust will help a lot. A proficient method for setting the blade depth will keep things moving quickly too.
How to make a tongue and groove joint with a table saw
- Install the proper saw blade – You will usually want to use a dado stack for making this joinery. A standard blade is adequate for thin stock, however.
- Set blade height – Remember that the height of the blade determines the size of the tongue and depth of the groove.
- Adjust rip fence – The fence will provide support as you make the cuts along the edge of the board.
- Make a practice cut – It is better to make an error on a piece of scrap wood rather than your project pieces
- Make your cuts – Cutting the tongue requires the removal of stock on both sides. A single cut will make the groove.
How To Make A Tongue And Groove Joint With A Router
As you learn how to make a tongue and groove joint, you will discover that many hobbyists make tongue and groove with hand router on a table. A tongue and groove jig is also a popular accessory that speeds up the process.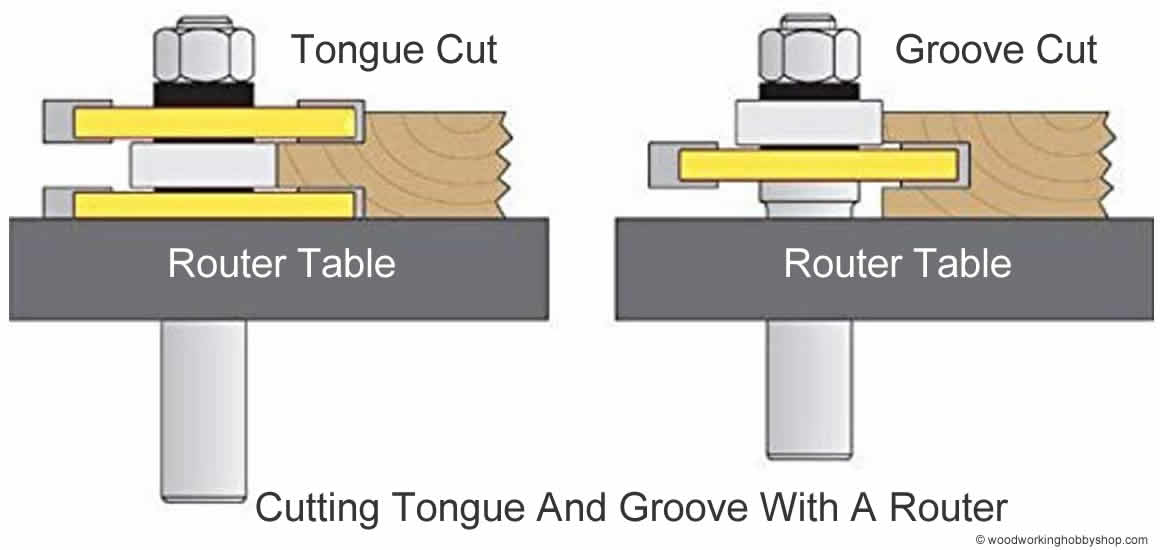
A note about making tongue and groove with hand router only
Beginners learning how to make a tongue and groove joint with a router might want to cut the wood joints without using a router table. Cutting a tongue and groove with hand router alone can be dangerous. It also adds to shop time and potential errors when making the wood joint.
Use a router table when making tongue and groove with router tools. You will find it faster and more accurate, as well as safer to cut.
Using a tongue and groove jig
If you have spent any time in the shop, you know how effective jigs can be. A tongue and groove jig will save you time during setup and while removing material. They also guide you as you cut tongue and groove with router bits, preventing you from drifting as the router moves.
- Select the type of router bits you will use – As we will discuss below, there are various designs that you can choose from for making tongue and groove with router bits.
- Setup for groove cut – In many instances, setting up for the groove is fast and easy. Once the groove is complete, you can then set your router table up to make the tongue.
- Adjust the fence – Move it into position so that it can adequately support the workpiece as you router along the edge of the board.
- Cut tongue and groove with router – Make a pass across the bit with the workpiece.
Best Tongue And Groove Router Bits
One thing that might surprise you as you learn how to make a tongue and groove joint is the variety of selections for a tongue and groove router bit.
Tongue and groove router bit designs include:
- Straight tongue groove router bit
- Matched tongue and groove router bit designs
Straight tongue groove router bit
Most woodworkers will have access to a straight router bit. They are general-purpose, so you can use them for various projects besides cutting this type of wood joinery.
They have a cutting edge along the sides and bottom of the router bit. Some woodworkers find them less-forgiving than a router bit designed specifically for cutting this type of wood joint, but they are easy to find and come in a wide range of sizes.
Matched tongue and groove router bit designs
For many woodworkers, the best tongue and groove router bits are specific to the task at hand. A router bit set is a matched pair provides one bit for cutting the groove and a second bit for cutting the matching tongue. These designs have cutting edges along the sides of the router bit.
They are specialty bits, and you will find that they are not very useful outside of making tongue and groove wood joints. Each bit provides an accurate and clean cut that is hard to match though so if you are making a lot of tongue and groove flooring or wood paneling then a matched tongue and groove router bit set will be invaluable.
Tongue And Groove Table Saw Vs Router
The power tools in your shop will usually determine tongue and groove table saw vs router selection. If you have the luxury of owning a table saw and a router, some of these things may influence your choice:
Tongue and groove table saw vs router
- Router tables take up less room – Usually, a router table will be smaller than a table saw.
- Table saws offer more support – If you are working with long pieces of lumber, you might find the added support from a long tabletop important.
- Saw blades encounter less resistance on deeper cuts – We have found that deeper cuts on the edges of boards can produce blowouts. Saw blades might experience fewer issues at depth, but we suggest keeping tongues and grooves as shallow as possible to prevent breaks along the shoulders.
- Routers are faster for most users – Set-ups and cuts are quicker on a router table for most hobbyists.
How To Make A Tongue And Groove Joint – Getting Into The Groove
Learning how to make a tongue and groove joint is relatively simple. It provides you with a strong woodworking joint used for boxes, chests, flooring, ceiling and walls paneling.
As you learn how to make a tongue and groove joint, you will find a method for you and your shop. That can include traditional woodworking with hand planes or modern power tools in the form of a table saw or router table.
With plywood and other sheet goods available to modern woodworkers, the tongue and groove joint has waned a bit in popularity. That is unfortunate, as this woodworking joint allows you to create paneling from solid wood.
Need More?
Check out our complete rundown on woodworking power tools here
Go here for a review on how to buy the best table saw under $300
And our reviews of the best table saw for woodworking here
A completely different method of joinery to the mortise and tenon joint or the dovetail but equally as versatile a woodworking joint you will find many uses around the home and shop.
So, when you next visit your woodshop, consider learning how to make a tongue and groove joint. It will improve your woodworking skills and the results. Most of all, you will have lots of fun!


Leave a Reply